RSiena (tutorial)
This tutorial illustrates how to analyze longitudinal network data by using RSiena from within visone. We assume that you have installed R on your computer and configured the R connection as it is explained in the installation tutorial. We also assume that you have basic understanding about how to work with visone as it is, for instance, explained in the tutorial on visualization and analysis and basic knowledge of stochastic actor-oriented models (SOAM).
To follow the steps illustrated in this tutorial you should download the file Classroom_graphmls.zip and extract (unzip) its content (consisting of the network files classroom_graph1.graphml to classroom_graph4.graphml) to your hard disk. These files constitute the longitudinal network data explained on page Knecht Classroom (data).
Defining longitudinal network data
Stochastic Actor Oriented Models (SAOMs) are designed for analysing longitudinal network data given as network panel data, i.e., a sequence of networks representing one network observed at several moments in time.
Such network panel data are encoded in files classroom_graph1.graphml to classroom_graph4.graphml. To load them click on the menu file, open, navigate in the file browser to the directory where you've put the files classroom_graph1.graphml to classroom_graph4.graphml and select all of them before you click the ok button. (Selection of these files can be done in different ways, for instance, by keeping the Control-key pushed while successively selecting the files with a mouse left-click or by clicking on one of the files and then typing Control-a to select all files in the current directory.)
The four networks should be shown in four separate tabs in the network area. However, visone does not yet know that they belong together as a longitudinal network. This information must be given by combining them to a network collection which is a collection or sequence of several networks that belong together, e.g., by building a longitudinal network. Basic application scenarios related to network collections are explained in the tutorial on network collections and dynamic networks.
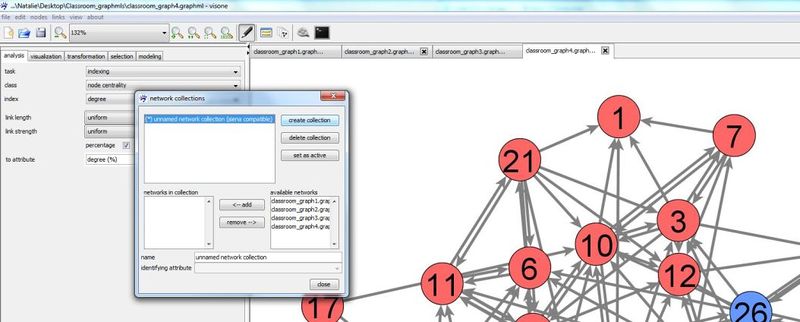
A network collection can be defined in the network collection manager. To open the network collection manager press button ![]() in visone's toolbar
in visone's toolbar
Press create collection button to create a new collection. A new collection is named 'unknown network collection' by default. You can change the name by clicking in the editable field name and typing a new one.
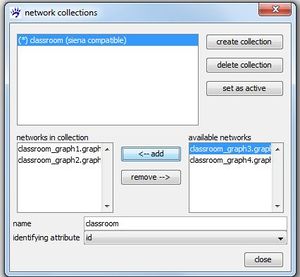
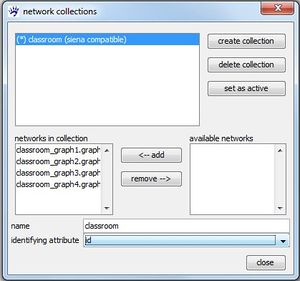
In the right table available networks all networks that can be added to the selected network collection (indicated by the blue background) are listed. This are basically all currently open networks. Select one of them by clicking at its name and press <- add to add it to the seleted collection. The table networks in collection shows you all networks so far contained in the currently selected collection. Note that the top-down order in this table determines the order of the networks in the network collection, hence, has to correspond with their temporal order in the longitudinal network. If the current order is not as you want it, you can rearrange it by removing networks from the collection (clicking at their name and press remove ->) and adding them again which will position them at the very end of the collection.
The important option that you have to set is the identifying attribute being the name of the attribute that identifies nodes over different time points. Note that in the current example you are only offered to choose id as the identifying attribute (note that the attribute indegree is not an option for the identifying attribute since its values are not unique, i.e., several nodes have the same indegrees). While you can create a network collection even if some nodes are not present at all time points, a network collection is marked as being siena compatible if all nodes are present at all times. If a network collection is not siena compatible it cannot be modeled with RSiena but you can nevertheless compute a dynamic layout. More than one collection can be created and you can switch between them with the set as active button in the collection manager.


